
Ever put in a development ticket for what you thought would be a simple tracking code update? And then waited weeks for the task to be completed?
Google Tag Manager (GTM) saves marketers and developers alike by allowing you to set up tracking codes for analytics and ad platforms through one simple interface. In this article, I’ll walk through setting up a GTM account, creating your first tags and triggers, and using the platform to streamline your tracking setup process.
Understanding Google Tag Manager hierarchy
The account is the top level of GTM hierarchy. If you’re managing GTM from an agency login, you’d generally want to create one account per each brand you work with, and a container for each website that brand uses. You can access multiple accounts via the same Google login.
A container includes a unique GTM code, which you should add across the site you want to track.
Within each container, you’ll then set up tags that fire tracking codes on your site. Triggers define when tags will fire. Variables are functions you can use on a more granular level indicate when tags will fire.
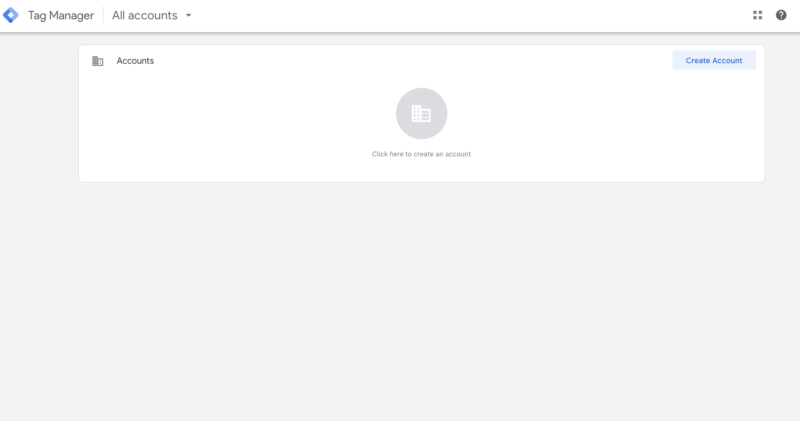
Setting up your account
To start setting up your account,

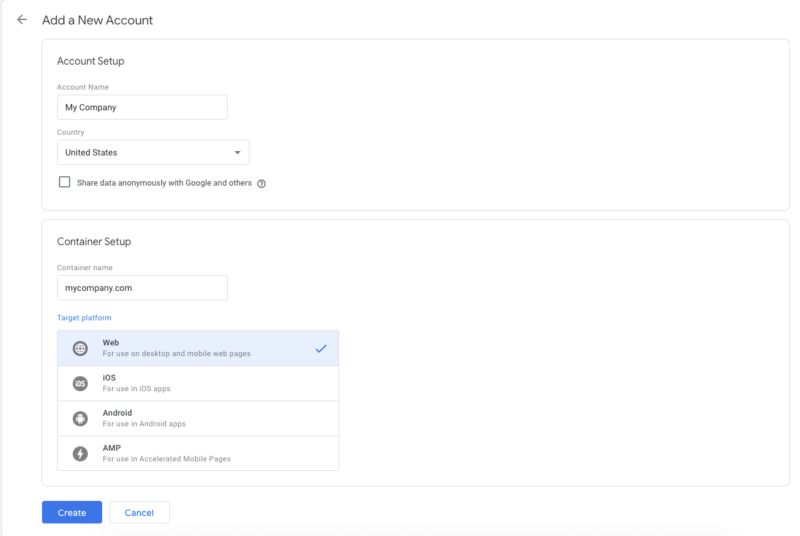
You’ll then see a screen where you create an account.
Enter the relevant info into the fields and select the platform. In this article, we’re talking about using GTM for web, but you can also set up accounts for apps and AMP (Google’s framework for mobile pages).
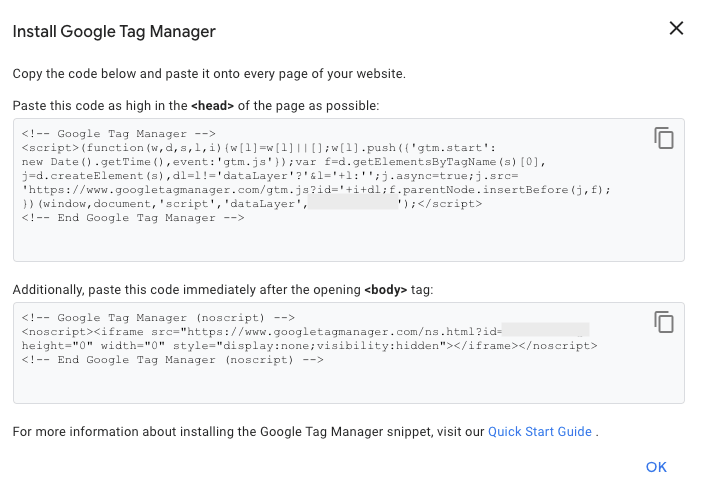
Click Create, and you’ll see the GTM code, which you can then add to the site. If you’re comfortable editing your site’s source code, add the first code within the <head> and the next code right after the opening <body> tag, or send the codes to a developer to install.
Depending on your CMS, you may also be able to set up GTM via a plugin. If your site is on WordPress, try this Google Tag Manager for WordPress plugin
Setting up tags
GTM includes several built-in tag templates for major analytics and ad platforms. These include Google products, such as Analytics, Ads, Optimize, and Surveys, as well as several third-party platforms, such as AdRoll, Microsoft Advertising, LinkedIn and Quora. If a tracking tag doesn’t have an existing template, you can also use a Custom HTML or Custom Image tag.
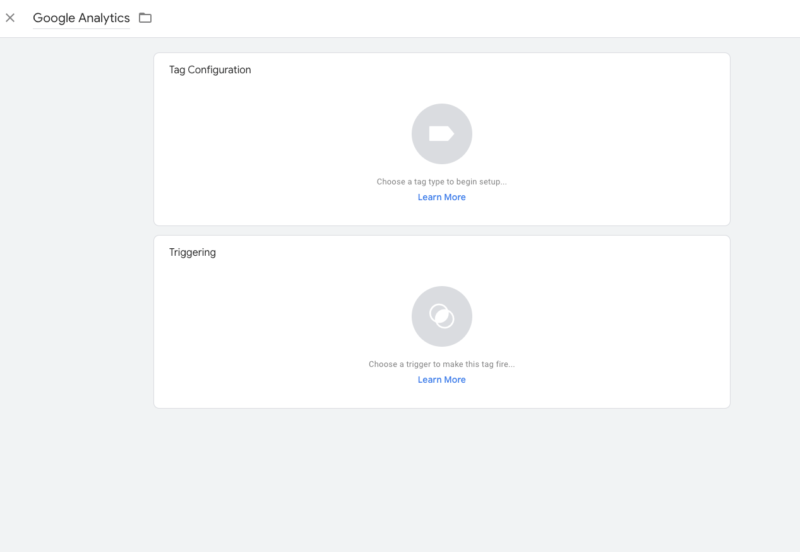
To create your first tag, click “Add a new tag” from the Overview screen.

Now you can start defining criteria for your tag.
In the top field, add a name. Be sure to think about naming conventions that will allow you to keep track of several tags easily. I like to start with the name of the platform associated with the tag, followed by the type of tag and unique criteria.
For instance:
- Google Ads – Conversion – Brochure Download
- Google Ads – Conversion – LP Lead
- Google Ads – Remarketing
Clicking within the “Tag Configuration” box allows you to choose your tag type. You can scroll through to find your desired tag, or you can click the magnifying glass to search by name.
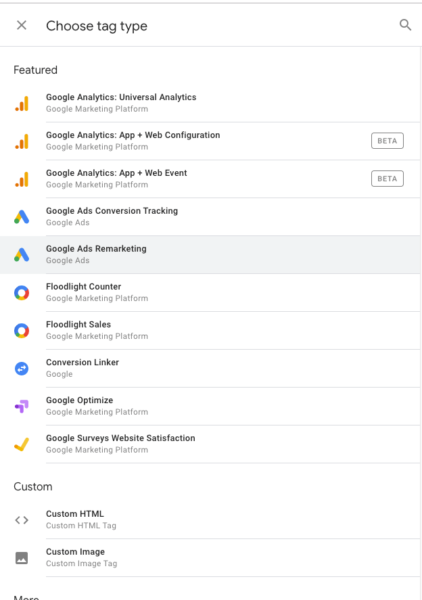
Once you select your tag, you’ll see fields customized based on the associated platform. You can then fill in the criteria.
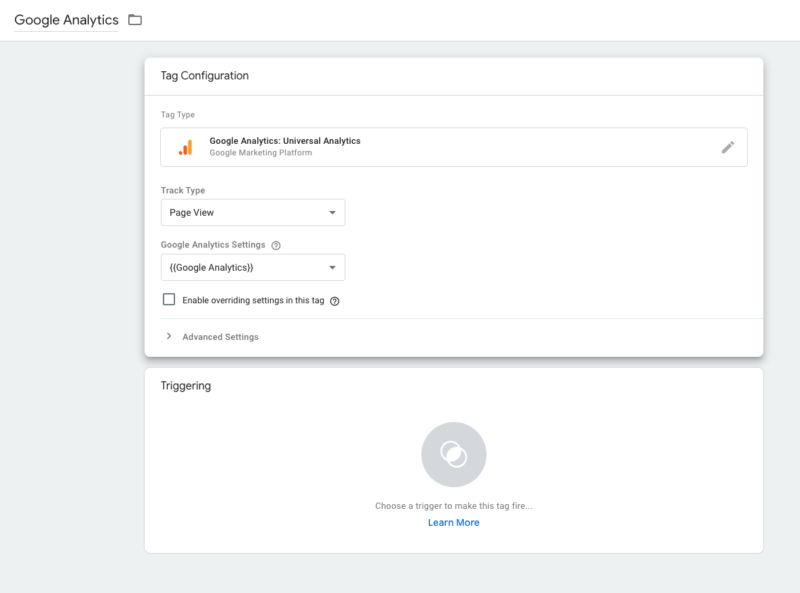
Generally, for each template, you’ll need to pull an ID number from your analytics or ad platform, and then you can use the additional fields to adjust what you want to track.
Have the code for a tracking tag, but don’t see a template? Choose a Custom HTML tag type, and paste your code into the box.
Setting up triggers
Next comes the Triggering box, where you can choose a trigger that will cause your tag to fire. Triggers can be based on a number of actions such as pageviews, clicks, element visibility, form submissions, time on site, custom events and more.
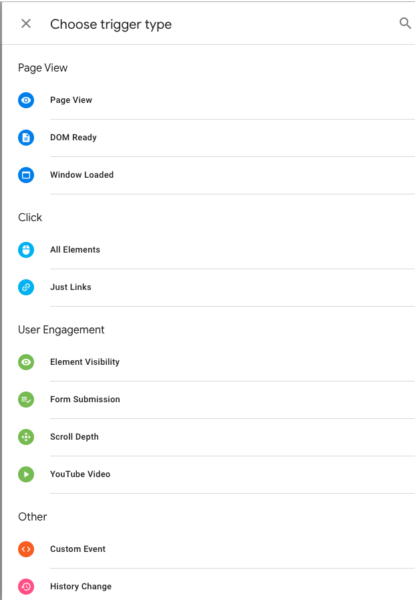
Choose the trigger you want and then use the fields to specify criteria.
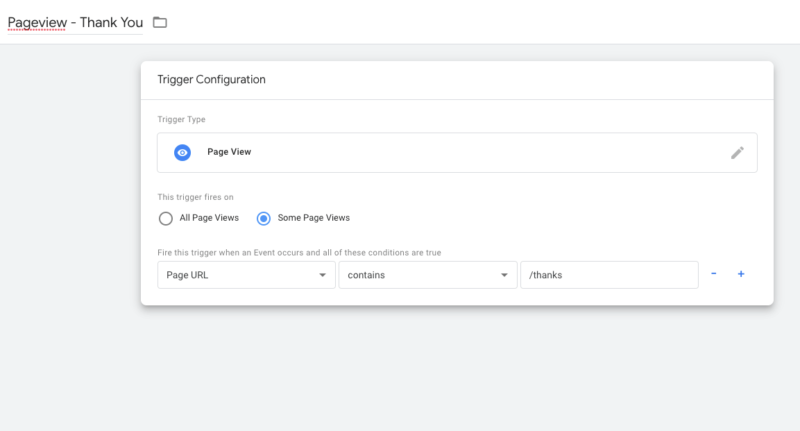
For instance, this pageview trigger will fire when the /thanks URL is viewed. You can also add multiple conditions, all of which will need to be true before the trigger fires. For instance, you might want to only fire a tag if a certain page is viewed and a user completes an event on the page.
Enabling variables
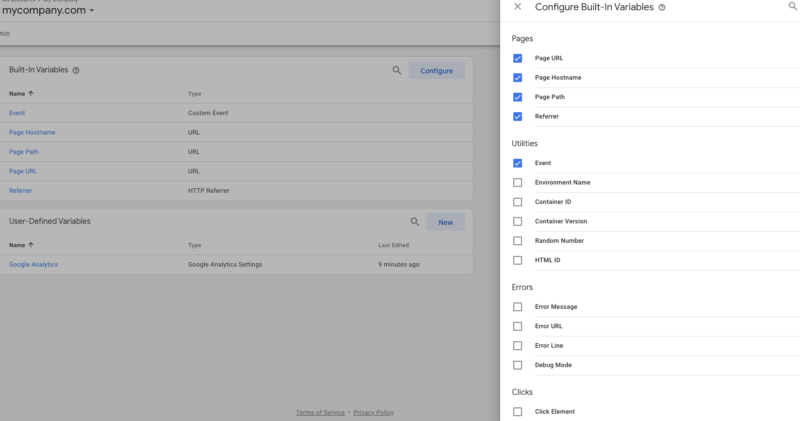
Note that a limited amount of variables appear in your options by default when setting up triggers. If you want to delve into more precise customization, be sure to enable additional variables in the interface.
Navigate to the Variables section and select “Configure” by “Built-In Variables.” You can now select the additional ones you’d like to add. For instance, you might want to target clicks for buttons that all have the same CSS class. You can check the box next to “Click Classes” and you’ll now see this variable as an option.
You can also create custom variables from the User-Defined Variables section. One common use is the Google Analytics Settings variable, which holds your Google Analytics ID to be used whenever setting up an Analytics tag. Custom events are also useful to target specific actions on the site that can’t be otherwise pinpointed with the default variables.
Going live and testing
All changes you make within GTM occur in a draft mode that doesn’t go live until you submit it. You can preview your setup on your site by using the Preview button on the upper right. You’ll see a bar at the bottom of your browser window letting you know when tags fire.

Once you’ve confirmed your setup appears to be accurate, click “Submit” to make everything live.
After deploying tags on your site, you can also test for proper installation with Google Tag Assistant. nstall the Chrome extension and navigate to the site. Click the Tag Assistant icon, and select “Enable” for your site.
You should now be able to see what tags are firing on your site, as well as if there are any errors. Click on an individual tag to see more details about errors and any recommendations to fix your implementation.
Start streamlining your tracking
Once you’ve set up your GTM account, take the time to play with setting up tags. A global Google Analytics tag, a Google Ads remarketing tag and a Google Ads conversion tag are good ones to start.
Once all your ad platforms’ tags are represented, you can now make simple adjustments if changes are made to the site (for instance, if Thank You page URLs change) directly through GTM versus having to change hard-coded tags on the site.